Link
Please see the Installing the Outlook Client article for install steps.
For practical use of this feature, please visit the Set Regarding Process article.
The Microsoft Dynamics CRM for Outlook Client (Add-In) provides a link between your Office applications (Outlook, Word, Excel) and Dynamics CRM / MiiiA.
The Outlook Client provides us the ability to:
- Sync Appointments from your Outlook Calendar & Email from your Inbox

- Link to Microsoft Office applications like Word for Mail Merge


Add A New Configuration
Once you have installed the Microsoft Dynamics CRM for Outlook Client you can follow the steps below to configure it with your credentials.
- Close Outlook
- Open your computer’s START Menu
- Navigate to All Programs > Microsoft Dynamics CRM folder
- Run the app called Configuration Wizard
![]()

Info
If this is the first time you've run this, or there are no existing configured credentials this screen will be bypassed.
- Click Add
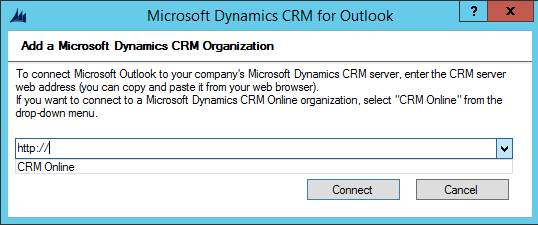
- Select CRM Online from the dropdown
- Click Connect

- Enter your MiiiA Username Typical format:
user@yourorganisation.com.au or user@yourorganisation.onmicrosoft.com
Tip
Be sure to have set your permanent password by logging into the MiiiA Website first with your TEMP Password provided by us.
- Enter your MiiiA Password
- Click Sign in
Assistance
If you can’t authenticate, send an email to support@miiia.com.au and request a Password Reset
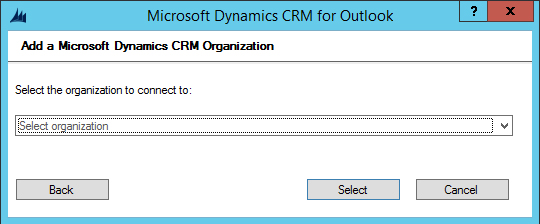
- If prompted Select organization from the dropdown
(This will only be the case if more than one instance is setup, one for Production, and one Sandbox for testing purposes. Never choose the "Sandbox")
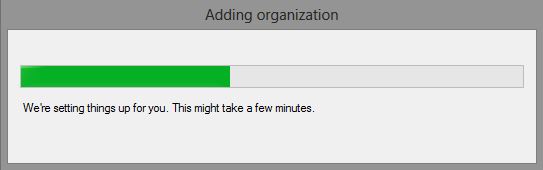
- Please wait for the configuration to complete
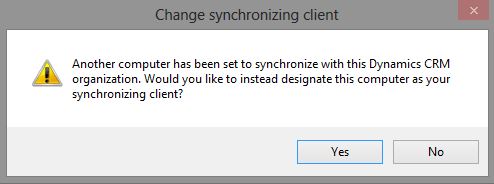
- If you receive a message asking if you want to designate this computer as your synchronizing client…
- Click Yes

- You will be returned to the main window, showing your configured organisation
- Click Close
Diagnostics
- Close Outlook
- Open your computer’s START Menu
- Navigate to All Programs > Microsoft Dynamics CRM folder
- Run the app called Diagnostics
![]()
- On the first tab Synchronization Troubleshooting
- Tick Background Send Email

- On the second tab Advanced Troubleshooting
- Click the Delete Temporary Files button
- Click the Enable Add-In button
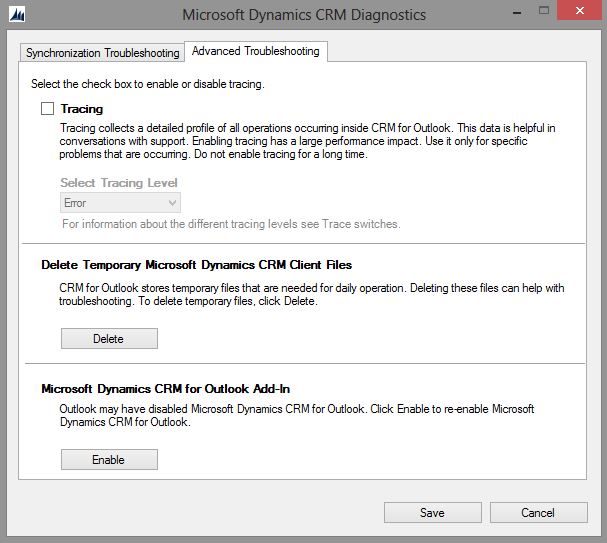
- Click Save
Restart Outlook
- Open Outlook
Info
On your first run after configuring the Outlook Client please give your Outlook 10 minutes to start up, and synchronise.
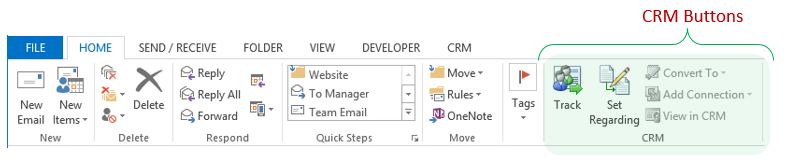
- Once loaded, look to the ribbon menu to see the new buttons
- These buttons will be available in both the Email and Calendar areas of Outlook