
D365 Tiles · Admin
Add Tile Sets to Dashboards
Being updated. This article comes from our old Help Center. Its steps and screenshots show the older Dynamics 365 interface, so some menus may look different today.
It’s simple for a System Administrator (or System Customizer) to setup and implement Tiles in your organization. If they are familiar with adding Web Resources to Dashboards it’s a breeze, but also only a few steps for those not initiated. As a high-level overview:
Create a Tile Set
Section titled “Create a Tile Set”- Create at least one Tile Set record first or open an existing one (for example we’re creating one called “Tile Set (Link To)”)
- Add a few Tiles to the Tile Set for illustrative purposes
- Copy the CopyID GUID for use later
See also: For more info please see the Creating Tile Sets and Creating Tiles articles
⚠ Image lost:
D365-Tiles-TileSet-Record.jpg
Dashboard Web Resource
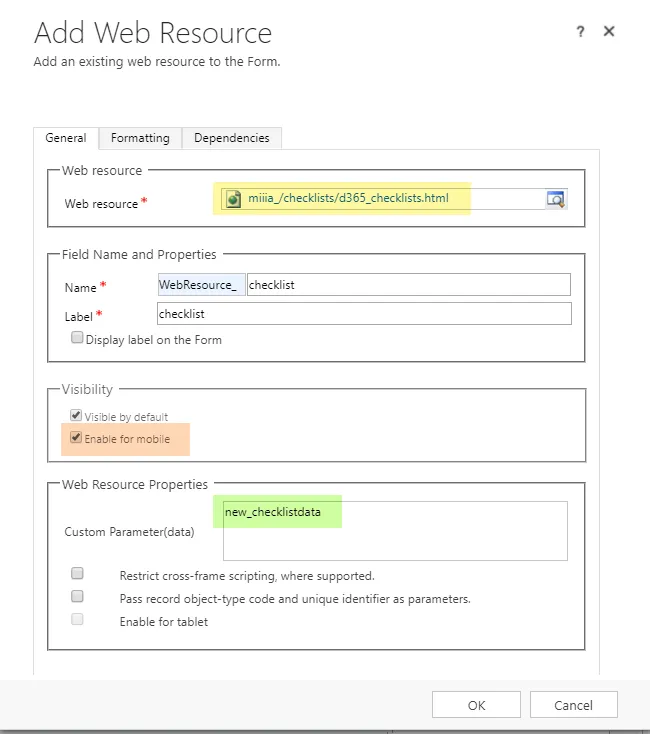
Section titled “Dashboard Web Resource”- Add a Web Resource to a new or existing Dashboard specifying: Web resource = miiia_/tiles/d365_tiles.html
- Check the Enable for mobile if you wish to render in native mobile apps
- Add the Copy Id (copied from your Tile Set record) as the Custom Parameter
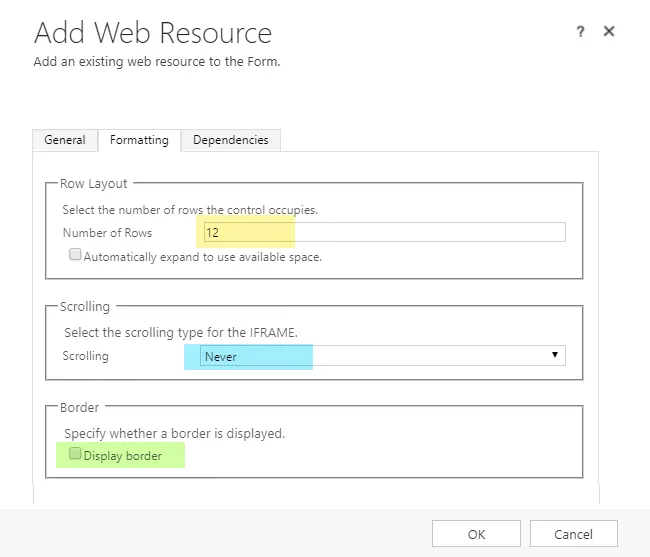
- For better visual results, on the Formatting tab of the Add Web Resource dialog, set the Number of Rows, Scrolling, and Display Border parameters to your liking.
- Publish All Changes, you’re done!